How to Adjust Video Speed in CapCut: The Ultimate Guide
Video speed manipulation is one of the most powerful and versatile tools in modern video editing. Whether you want to create cinematic slow motion, high-energy fast sequences, or dynamic speed transitions, controlling playback speed allows you to tell stories, emphasize key moments, and create highly engaging content. With CapCut, video speed adjustment is simple yet highly effective, enabling both beginners and professionals to produce polished and cinematic results.
This detailed guide will explain everything you need to know about adjusting video speed in CapCut, including step-by-step instructions, advanced techniques, expert tips, creative use cases, common mistakes to avoid, and professional export recommendations.
What Does Adjusting Video Speed Mean?
Adjusting video speed involves changing the rate at which your footage plays back. By increasing or decreasing playback speed, you can influence the pacing, mood, and storytelling of your video.
In CapCut, speed adjustments can be applied to:
- Entire clips for uniform slow or fast motion
- Specific sections using variable or curve speed
- Overlays and text animations for synchronized motion effects
When you slow a clip down, every movement becomes more noticeable, dramatic, or cinematic. Conversely, speeding up footage can compress time, energize sequences, or create humorous effects.
Video speed is not only a creative tool but also a strategic one. It can highlight details, enhance viewer engagement, and align motion with music or narration for maximum impact.
Why Adjusting Video Speed Is Important
Speed adjustment is more than just a technical effect; it is a storytelling and engagement tool that enhances your content in multiple ways.
1. Emphasizes Key Moments
Slowing down critical moments draws viewer attention to important actions or details. For example:
- Highlighting a jump or trick in sports footage
- Emphasizing a product reveal in a commercial
- Capturing facial expressions in reaction videos
This ensures viewers notice and remember the most significant parts of your video.
2. Improves Storytelling and Pacing
The speed of your video greatly affects its narrative flow. With CapCut, you can:
- Use fast motion to condense long sequences into a few seconds
- Apply slow motion to dramatic or emotional moments
- Combine different speeds for variable pacing within a single clip
Well-paced videos are more engaging, easier to follow, and professionally appealing.
3. Adds Cinematic Style
Cinematic videos often rely on speed manipulation to create drama or rhythm. Slow motion sequences can evoke emotion or tension, while fast motion conveys urgency or energy.
CapCut allows creators to replicate these cinematic techniques:
- Slow down action shots for dramatic effect
- Speed up transitional sequences to maintain momentum
- Combine speed adjustments with color grading and motion effects for a professional look
Even amateur creators can produce visually striking content with these techniques.
4. Enhances Social Media Engagement
On platforms like TikTok, Instagram Reels, and YouTube Shorts, fast and slow motion sequences capture attention quickly:
- Fast motion adds humor, energy, and brevity
- Slow motion draws attention to dramatic or visually stunning moments
- Variable speed makes videos more dynamic and shareable
Engaging videos increase watch time, interaction, and visibility on social media feeds.
Step by Step Guide: How to Adjust Video Speed in CapCut
CapCut offers intuitive tools to adjust speed, whether you want a simple slow motion or complex variable speed animation.
Step 1: Open Your Project and Import Your Clips
- Launch CapCut
- Tap New Project
- Select and import the video clips you want to edit
- Arrange clips in the timeline
Tip: Trim unnecessary parts before adjusting speed. This provides better control over motion and ensures smooth playback.
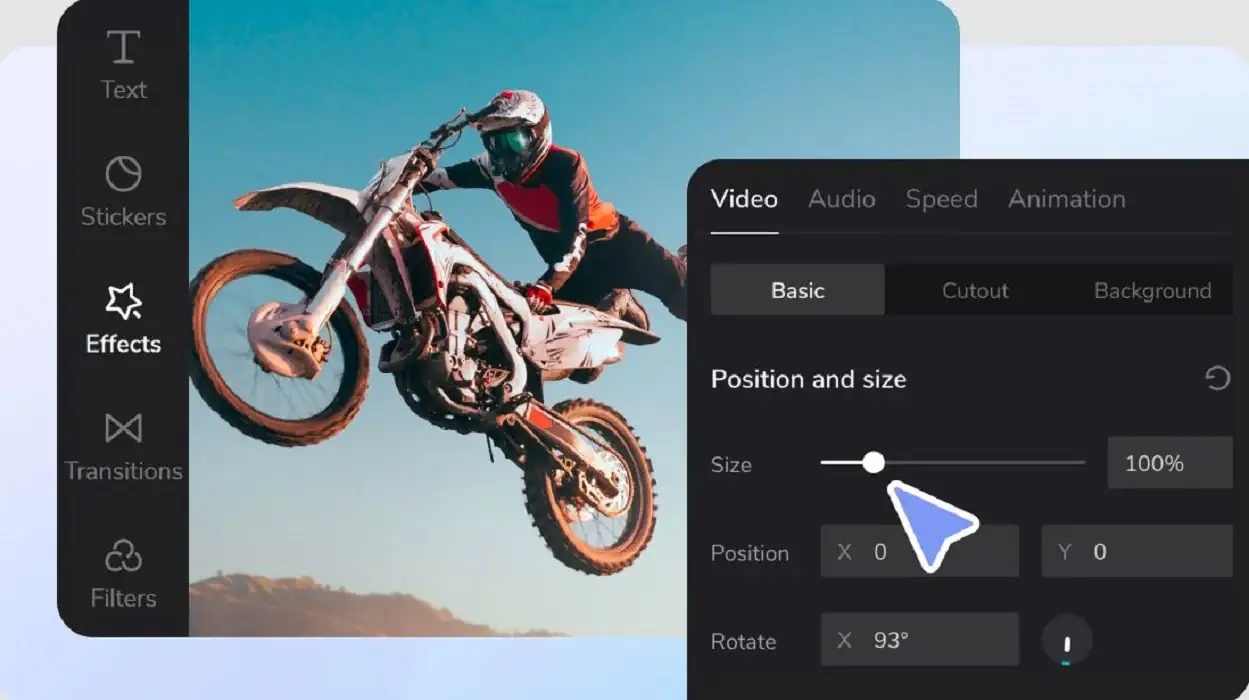
Step 2: Select the Clip You Want to Adjust
Tap the clip on the timeline to reveal editing options. The speed tool will appear in the menu, usually labeled Speed.
CapCut allows you to adjust:
- Entire clip speed uniformly (Normal mode)
- Specific sections with gradual or variable changes (Curve mode)
Step 3: Choose a Speed Adjustment Mode
CapCut offers two primary modes for speed control:
Normal Speed
- Applies a uniform speed change to the whole clip
- Slower playback: drag the slider below 1x
- Faster playback: drag the slider above 1x
- Ideal for consistent slow motion or fast motion effects
Curve (Variable Speed)
- Allows you to change the speed dynamically within a single clip
- You can slow down the beginning, speed up the middle, and slow down again at the end
- Provides smooth acceleration and deceleration for cinematic sequences
Variable speed is perfect for storytelling, tutorials, and social media content where you want to highlight specific moments.
Step 4: Adjust Normal Speed
- Tap Speed > Normal
- Drag the slider to set the desired speed
- Preview the clip and fine-tune the setting
Tips:
Lower speeds (e.g., 0.5x) produce slow motion
Higher speeds (e.g., 2x or 3x) create time-lapse or comedic fast motion
Avoid extremely low or high speeds on low-resolution footage to prevent choppiness
Step 5: Apply Curve (Variable Speed)
- Tap Speed > Curve
- Choose a preset curve (Ease In, Ease Out, or Custom)
- Adjust keyframes along the curve to control speed transitions
- Preview the animation and refine timing
This method allows gradual acceleration or deceleration, creating professional cinematic movement without additional software.
Step 6: Fine-Tune Audio
Speed adjustments affect audio pitch and timing:
- CapCut automatically corrects pitch to avoid unnatural sound
- Tap Edit Audio for manual adjustments
- You can mute original audio and overlay music or voiceovers
- Align audio with video motion for maximum impact
Audio synchronization ensures your speed edits feel professional.
Step 7: Preview and Refine
Always play back your edited clip to check:
- Smoothness of motion
- Audio alignment
- Visual consistency with other clips
- Overall storytelling effect
Make small adjustments to keyframes, speed curves, or clip timing to achieve optimal results.
Advanced Techniques for Video Speed Control
1. Combine Slow and Fast Motion in the Same Clip
Use variable speed to emphasize key moments while condensing less important sections:
- Slow down dramatic or action-heavy moments
- Speed up transitions or less significant footage
- Add visual impact without increasing video length
This technique is widely used in cinematic content, sports highlights, and creative social media videos.
2. Sync Speed Changes With Music
Matching video speed adjustments with music beats creates dynamic and professional content:
- Slow motion for dramatic beats
- Fast motion for energetic sequences
- Use curve speed to align gradual tempo changes with music intensity
Proper synchronization enhances emotional impact and engagement.
3. Apply Speed Adjustments to Multiple Clips
- Select multiple clips simultaneously
- Apply uniform speed changes for consistency
- Maintain visual rhythm across a scene or video segment
Consistency is key for storytelling and professional content presentation.
4. Combine Speed Changes With Keyframes
For advanced animations:
- Use keyframes to move objects while adjusting clip speed
- Create effects like floating objects in slow motion against fast-moving backgrounds
- Apply to text, stickers, or overlays for cinematic impact
Combining keyframes and speed changes unlocks limitless creative possibilities.
Tips for Using Video Speed Effectively
- Plan Your Speed Changes: Know which sections benefit from slow or fast motion
- Avoid Excessive Fast Motion: Too fast can confuse viewers or obscure details
- Use Slow Motion Strategically: Emphasize key moments without disrupting pacing
- Check Audio: Ensure narration or sound effects remain intelligible
- Preview Frequently: Minor adjustments can drastically improve smoothness and timing
Common Mistakes to Avoid
- Changing speed without trimming unnecessary footage
- Ignoring audio adjustments after speed changes
- Applying extreme slow motion on low-frame-rate footage (causes choppiness)
- Overusing speed adjustments, which can confuse viewers
- Forgetting to align speed changes with narrative or music
Avoiding these mistakes ensures professional, engaging, and visually appealing content.
Best Use Cases for Video Speed Adjustments
- Sports Videos: Highlight tricks, stunts, or key plays
- Tutorials: Slow down critical steps for clarity
- Travel Vlogs: Compress travel sequences with fast motion
- Product Reveals: Use slow motion to show intricate details
- Social Media Reels: Combine fast and slow motion to maintain engagement
Speed adjustment is versatile and can improve nearly every type of video content.
Mobile vs Desktop Speed Editing in CapCut
Mobile CapCut:
- Ideal for short-form content and quick edits
- Fast and intuitive speed adjustments
- Great for TikTok, Instagram Reels, or casual projects
Desktop CapCut:
- Offers precise timeline control for longer clips
- Easier to synchronize speed with audio and keyframes
- Better for multi-clip projects and professional edits
Many creators start on mobile for rough edits and refine on desktop for final export.
Export Tips for Videos With Adjusted Speed
- Use 1080p or 4K resolution for clarity
- Keep original frame rate to avoid jitter
- Preview on multiple devices to ensure smooth motion
- Adjust audio if necessary to maintain clarity
Correct export settings preserve smooth speed adjustments and professional quality.
Final Thoughts
Adjusting video speed in CapCut is an essential tool that can transform ordinary footage into engaging and dynamic content. By learning how to slow down important moments and speed up less critical sections, you can create videos that feel more cinematic and professional. Using speed adjustments, you can highlight key actions, add dramatic effect, and synchronize your clips with music or narration for a polished result.
When combined with keyframes, audio editing, and visual effects, your videos not only look smoother but also capture and hold viewers’ attention more effectively. Mastering this feature enhances your editing skills, boosts the overall quality of your content, and allows you to produce videos that feel intentional, creative, and professional.