How to Create Cinematic Videos in CapCut
Creating cinematic videos is no longer limited to expensive cinema cameras, professional studios, or complex desktop software. With the advanced editing features inside CapCut, creators can produce film style content directly from a smartphone or PC. Whether you create YouTube videos, Instagram reels, short films, travel montages, or promotional content, CapCut offers the tools needed to achieve a professional cinematic look.
This detailed guide is based on real editing workflows, professional storytelling techniques, and industry standard visual principles. By the end of this article, you will understand not only how to use CapCut tools, but why certain cinematic techniques work and how to apply them effectively.
Understanding What Cinematic Really Means
Many beginners think cinematic means adding black bars and dramatic music. In reality, cinematic editing is about emotional storytelling, visual consistency, and controlled pacing.
A cinematic video typically includes:
- Purpose driven storytelling
- Balanced exposure and dynamic range
- Film inspired color grading
- Controlled camera movement
- Clean and intentional cuts
- Natural sound design
- Emotional pacing
Cinematic content focuses on how the viewer feels. Every edit, color adjustment, and sound effect should support the mood. Whether you want a dramatic, romantic, nostalgic, or inspirational tone, your editing decisions must align with that vision.
Professional filmmakers focus on atmosphere. You can replicate the same approach in CapCut by being intentional rather than random with effects and transitions.
Plan Your Story Before Opening CapCut
Professional editors do not start editing randomly. Planning saves time and dramatically improves final quality.
Define the Emotion and Purpose
Ask yourself:
- What story am I telling?
- Who is my target audience?
- What emotion should viewers experience?
- Is this video inspirational, cinematic travel, dramatic, or emotional?
For example, a travel cinematic video may focus on freedom and exploration, while a short emotional film may highlight close up shots and slower pacing.
Create a Simple Storyboard
Even a basic shot outline helps:
- Opening establishing shot
- Main subject introduction
- Emotional or action highlight
- Closing cinematic moment
When you plan structure before importing clips into CapCut, your editing becomes more focused and professional.
Capture High Quality Footage
Cinematic editing starts during filming:
- Record at highest resolution available
- Use 24 frames per second for authentic film look
- Avoid shaky footage
- Use natural lighting whenever possible
- Frame shots using rule of thirds
Better footage equals better cinematic results.
Set Cinematic Aspect Ratio for Film Look
One of the most recognizable cinematic elements is widescreen framing.
Why Aspect Ratio Matters
Traditional movies use wider frames like 2.35:1. This wider look creates:
- Stronger horizontal composition
- Better landscape framing
- A premium film feel
How to Add Cinematic Black Bars in CapCut
- Open CapCut
- Create a new project
- Import your clips
- Tap Canvas
- Choose 2.35:1 or 21:9 ratio
- Adjust clip framing accordingly
You can also add overlay black bars for a classic film appearance. However, do not rely only on black bars. True cinematic quality comes from lighting, pacing, and color grading.
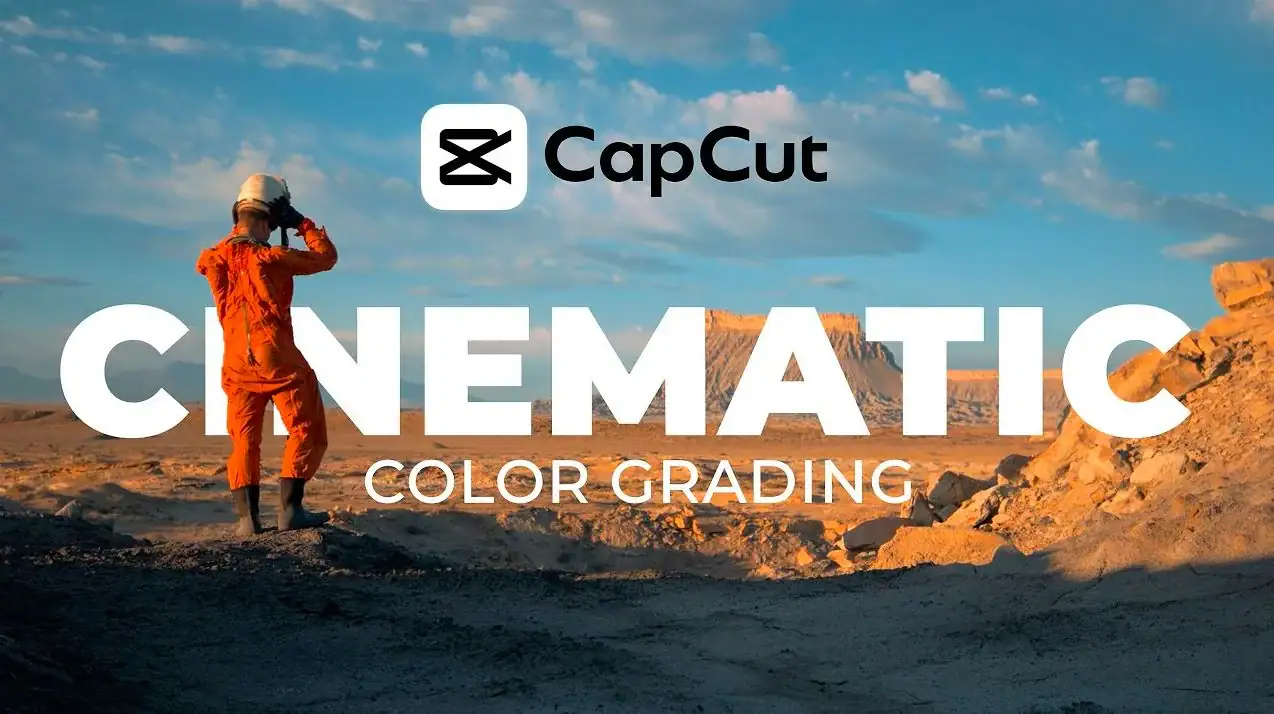
Master Professional Color Grading
Color grading is the most powerful cinematic tool inside CapCut. Proper color grading transforms flat footage into movie style visuals.
Basic Color Correction First
Before creative grading, fix exposure:
- Adjust brightness to balance scene
- Lower highlights to recover sky details
- Increase contrast slightly
- Reduce shadows carefully
- Fix white balance
Color correction ensures all clips look natural before applying cinematic tones.
Apply Cinematic Color Grading
Dramatic movie look:
- Add slight teal tone to shadows
- Add warm tones to highlights
- Reduce green tint
- Lower saturation slightly
- Add small amount of fade
Emotional scenes:
- Use softer contrast
- Warm overall temperature
- Reduce sharpness slightly
Dark cinematic mood:
- Increase contrast
- Deepen shadows
- Slightly desaturate colors
- Add subtle vignette
Professional tip: Subtle adjustments create premium results. Over grading makes videos look artificial.
Use Slow Motion Strategically
Slow motion enhances emotional moments and dramatic scenes.
Why Slow Motion Works – It allows viewers to absorb emotion and detail. It creates intensity and visual weight.
How to Apply Smooth Slow Motion in CapCut
- Select clip
- Tap Speed
- Choose Curve
- Select Smooth preset
- Adjust speed between 0.5x and 0.8x
If your footage was recorded in high frame rate like 60fps or 120fps, slow motion will look smooth and cinematic. Avoid slowing down normal 24fps footage too much, as it may cause stutter.
Use Subtle Cinematic Transitions
Cinematic editing prefers minimal transitions.
Best Cinematic Transitions in CapCut
- Fade In
- Fade Out
- Cross Dissolve
- Motion Blur
- Simple Cut
Hard cuts are often more professional than flashy transitions. Avoid excessive spin, zoom, or glitch effects if your goal is cinematic style.
Editing rule: If a transition draws attention to itself, it is too strong.
Add Professional Sound Design
Sound design is often ignored but it is critical for cinematic impact.
Choose the Right Background Music
Select instrumental, orchestral, ambient, or cinematic trailer music. Avoid overly loud tracks.
Balance audio levels:
- Dialogue: 80 to 100 percent
- Music: 30 to 50 percent
- Sound effects: 40 to 60 percent
Add Ambient Sound Effects
Examples:
- Wind
- City noise
- Birds
- Footsteps
- Water
Layering subtle background sound creates depth and realism. Professional editors say sound is 50 percent of cinematic experience.
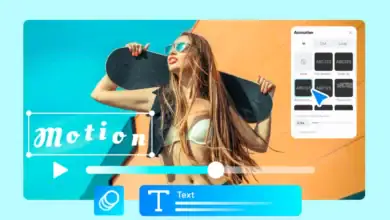
Use Keyframes to Simulate Camera Movement
Keyframes allow you to create motion inside static clips.
How to Add Cinematic Zoom Effect
- Select clip
- Add first keyframe at start
- Move timeline forward
- Slightly increase scale
- Adjust position for smooth zoom
This creates a slow push in effect similar to a cinema camera movement.
You can also create:
- Pan left or right
- Zoom out for dramatic reveal
- Subtle tilt motion
Smooth movement adds cinematic energy.
Add Film Grain and Texture
Film grain simulates real movie cameras.
In CapCut:
- Add grain effect
- Keep intensity below 20 percent
- Add subtle vignette
- Use light dust overlays carefully
Grain adds texture and reduces digital look. Avoid heavy grain which can ruin video clarity.
Control Pacing and Timing
Cinematic editing is about rhythm.
Cut on Beat – If using music, align cuts with musical beats for stronger impact.
Use Breathing Space – Do not cut too fast. Allow moments to breathe.
Build Emotional Flow –
- Start slow
- Increase intensity
- End with powerful shot
Professional pacing makes viewers feel immersed.
Export in High Quality Settings
Export settings protect your cinematic look.
Recommended settings:
- Resolution: 1080p or 4K
- Frame rate: 24fps
- High bitrate enabled
Always preview before exporting.
For YouTube upload, export in highest available resolution to maintain compression quality.
Advanced Cinematic Editing Techniques
If you want next level quality, apply these expert methods.
Speed Ramping – Create smooth speed transitions using curve tool. Start normal, speed up, then slow down for dramatic effect.
Match Cuts – Cut between similar movements or shapes to create seamless transitions.
Layered Color Grading – Use adjustment layers to maintain consistent tone across entire video.
Foreground Elements – Add subtle overlays like light leaks or shadows for depth.
Common Cinematic Mistakes to Avoid
- Overusing filters
- Too many transitions
- Oversaturated colors
- Excessive sharpness
- Loud background music
- Inconsistent color tone
Professional cinematic editing focuses on subtlety and balance.
Why CapCut is Powerful for Cinematic Editing
CapCut offers:
- Advanced color controls
- Keyframe animation
- Speed curve adjustment
- High resolution export
- Professional audio tools
For creators who want professional results without complex software, CapCut provides an accessible yet powerful solution.
Final Thoughts
Creating cinematic videos in CapCut is not about using every feature. It is about using the right tools with intention. Focus on storytelling, emotional pacing, controlled color grading, and professional sound design.
With practice and consistency, you can transform simple footage into powerful cinematic content that stands out on social media and video platforms.